


We detected, that your browser supports another language than the called one. This page is also available in your language! Would you switch to this page in your language?
PERFECT MACHINING, MAINTAINING AND SHARPENING BANDSAW BLADES Know-how band saws
Only professional sharpening and proper maintenance make bandsaws productive and effective tools in the long run. Care and maintenance of your bandsaw will affect its cutting quality. To achieve optimum cutting qualities, it is important to know how a bandsaw blade should be handled. You can see here what needs to be considered for the different methods of machining a bandsaw.
TYPES OF BANDSAWS
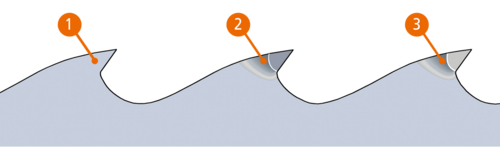
Depending on price, there are three different types of bandsaw:
- Swaged/set bandsaws made of CV steel (chrome vanadium steel)
- Stellite-tipped bandsaws
- Carbide-tipped bandsaws
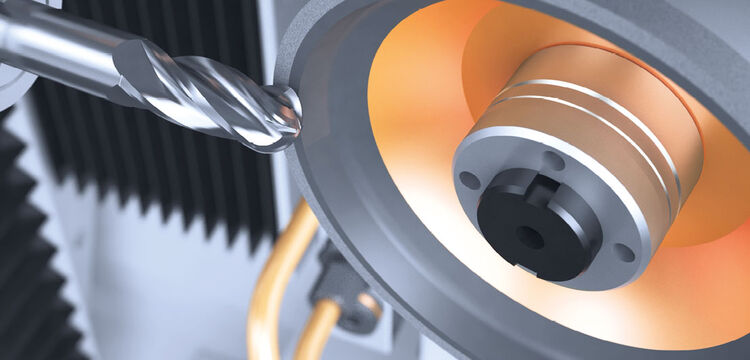
SHARPENING BANDSAW BLADES – PROFILE GRINDING
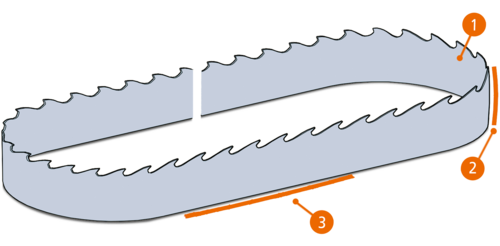
Bandsaw blades are highly sensitive. If maintained incorrectly, they may break. The reason for this is that bandsaws are subject to a constant bending cycle. This can cause hairline cracks to form in the tooth gullet, the area of highest tensile stress.
If the saw is not resharpened in time, these cracks grow and cause breakages. To prevent these, the whole profile, i.e. all the teeth (irrespective of their shape) of bandsaws made of CV steel and stellite-tipped bandsaws must be regularly resharpened – even when the usual degree of bluntness has not been reached in some places. Regular profile grinding and resharpening can prevent premature breaking of the bandsaw blade.
If profile grinding is not carried out professionally, problematic scratches and grooves form while excessive chip removal hardens the tooth gullet. However, with the right PROFILE GRINDING MACHINES in your sawmill or sharpening shop this is not a problem.
In order to prevent saws from becoming stuck during use, you need a side protection. Therefore, a bandsaw made of CV steel must still be set, or alternatively, swaged and levelled after profile grinding. In contrast, stellite-tipped bandsaws and carbide-tipped bandsaws require side grinding.
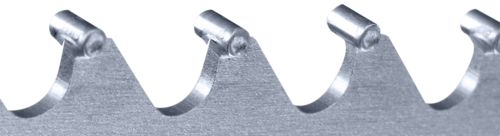
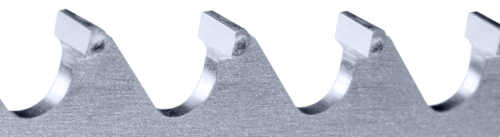
Stellite-tipping band saws
Stellite-tipping refers to the process of applying Stellite® to the saw teeth and thereby hardening them. This increases the abrasion resistance of the saw cutting edges, which in turn leads to longer machine service life, increased cutting accuracy and reduced set-up times.
Stellite-tipping is especially advantageous when particularly abrasive and hard woods are to be sawn. Stellite® no. 12 (containing 59% Cobalt, 29% chrome, 9% tungsten and 1.8% carbon) has proven to be extremely successful for machining wood. It is wear-resistant while not being too brittle, and can be ground without problems. In some cases, Stellite® no. 1 is used: This is an extremely hard alloy, which is primarily used for sawing wood with a high proportion of silicate.
In addition to painstaking manual stellite-tipping, there are two types of machine stellite-tipping: The resistive and the plasma welding process. During the latter, the saw tooth is heated and the required amount of stellite is melted. The liquid Stellite® is guided into forming jaws, where the raw tooth is shaped into a finished tooth. The sharpening work required is therefore reduced to a minimum. In contrast to the resistive process, fully automated plasma welding has the advantage that it forms a completely solid compound layer between the Stellite® and the base material. Last but not least, repairs or replacements are cost-effective, as new Stellite® is simply applied to the existing tooth, and the costly process of grinding off leftover Stellite® is not required.
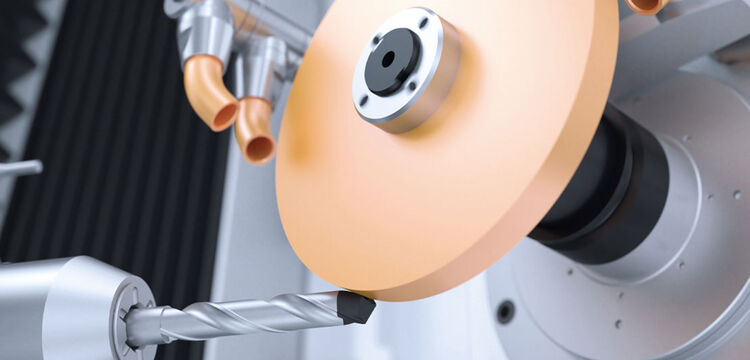
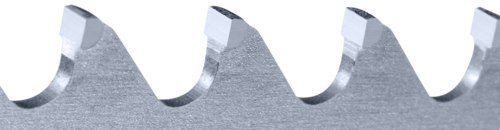
SHARPENING CARBIDE-TIPPED BANDSAW BLADES
SIDE GRINDING BANDSAWS
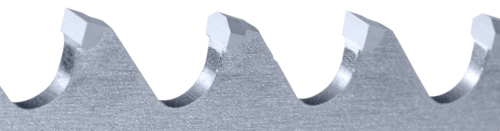
SETTING BANDSAW BLADES
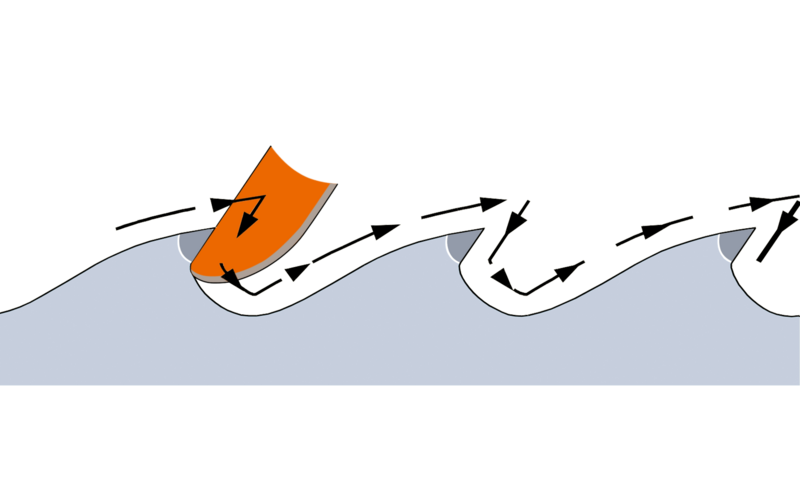
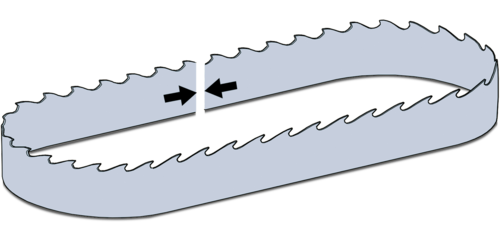
In order for a CV saw to be able to cut freely during machining, the saw kerf must be wider than the body. One possibility is to set the bandsaw teeth, and therefore the alternating bending. When doing this, it must be ensured that the teeth are not set too much, otherwise the cutting quality will be reduced. However, if they are not set enough, the saw heats up, develops burn marks and loses tension.
As a general rule, only the top third of the teeth should be set. However, the set width depends on various factors:
- Type of wood: The softer the wood, the greater the set width
- Wood moisture: The wetter the wood, the greater the set width
- Resin content: The higher the resin content, the greater the set width
- State of the wood: Frozen wood requires less set
- Type of wood fiber: Types of wood with extremely smooth fibers require more set
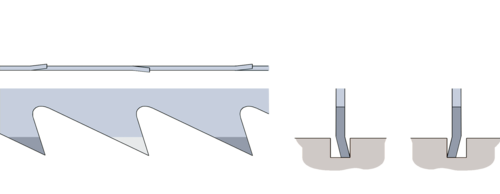
SWAGING AND LEVELING BANDSAWS
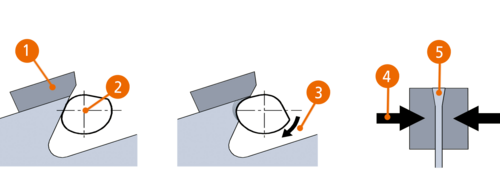
Swaging saw teeth is another possibility, along with setting, for ensuring that the bandsaw can cut freely during machining. For the swaging process, a swaging bolt is placed in front of the saw tooth. The saw tooth is held in place with an anvil. By turning the eccentric swaging bolt, the sawing material is pushed towards the tooth tip. When the swaging process has ended, the swaging bolt turns back to its starting position.
Leveling takes place after swaging, i.e. the material which was pushed towards the tooth flanks is pressed together with the appropriate equalizing jaws, so that the tooth tip is conically tapered downwards and backwards. As the swaged saw tooth works on the entire kerf width, it carries out the same work which would be carried out by two teeth on a set saw. The cutting power is increased thanks to the greater number of main and minor cutting edges. In addition, the hardness grade of the base material is increased thanks to the swaging process.
The swage must be adjusted for different types of wood in order to achieve the best possible Performance.
LEVELING, TENSIONING AND STRAIGHTENING BANDSAW BLADES
Leveling refers to the process of eliminating irregularities (dents/bumps) in the bandsaw blade. This is usually carried out as the first maintenance step. After being located with a straight edge, dents can be "hammered out" using a ball or club hammer whose weight must be matched to the blade thickness.
THE FOLLOWING GUIDELINES APPLY WHEN DOING THIS:
Hammer weighing 1250 g for blade thicknesses ≤ 1.65 mm
Hammer weighing 1500 g for blade thicknesses ≥ 1.65 mm
Hammers should have soft, rounded striking surfaces so they do not leave any imprints on the bandsaw blades, as this could negatively impact the service life of the blade.
Tensioning or stretching means extending the middle part of the bandsaw blade. This is carried out by rolling using a rolling machine. By stretching the middle zone, the toothing side and the rear edge become shorter in relation to the middle. As a result, when fitting the sawblade to the rollers in the sawing machine, the compressive stresses are released and the sawblade forms a curve in the middle. This prevents the sawblade from shifting back and forth at the most convex contact surface of the roller.
WHEN TENSIONING IS CARRIED OUT CORRECTLY, THE BLADE HAS THE FOLLOWING CHARACTERISTICS:
- The tooth edge is rigid and runs especially quietly during operation.
- The blade lies correctly on the rollers and withstands the stresses caused by high feed rates.
- The blade is not prone to drifting. Cutting quality and accuracy is maintained thanks to correct tensioning.
During straightening, the top of the bandsaw receives a slightly convex bowed shape using rollers. This balances out the extension of the toothing side when the saw is used. The final grinding process for the tooth gullet also causes the tooth baseline to be extended compared to the top. The condition of the sawblade must be checked along the entire top edge.
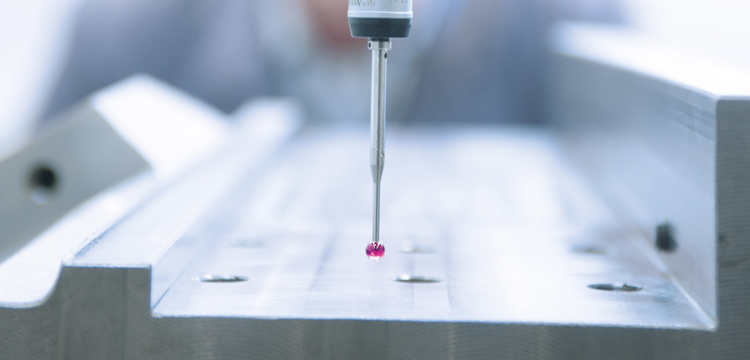
Measuring, straightening, tensioning and leveling: What used to be a labor-intensive manual task is now possible in one clamping Operation.
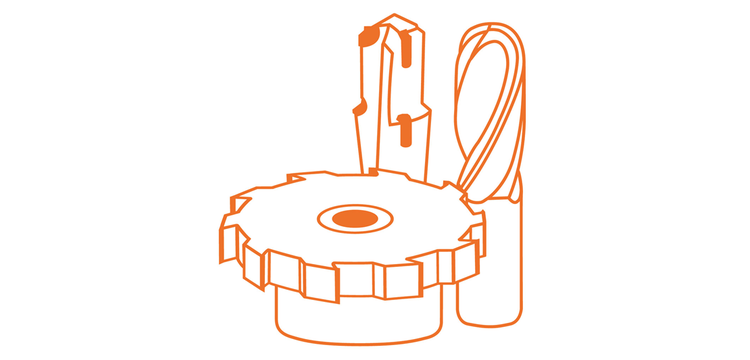
Welding band saw blades
Welding is required to join band saw blades or repair cracks. The ends of the saw blades must be cut exactly square beforehand, and the cut surfaces must be cleaned. When this is done, the welding seam is laid on the top of the tooth. The point to be welded is then preheated to approx. 100 °C using a heating plate. After the welding operation, the blade must again be annealed to approx. 450 °C, so that the hardened structure returns to normal and the weld bead does not tear.
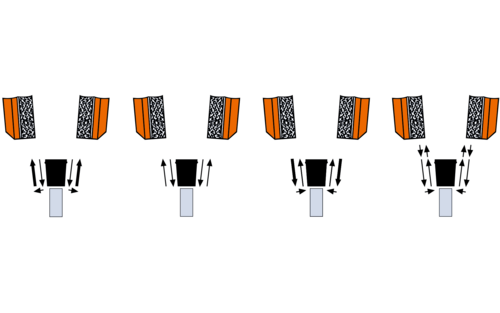
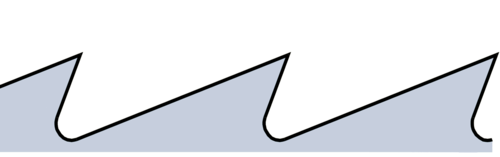
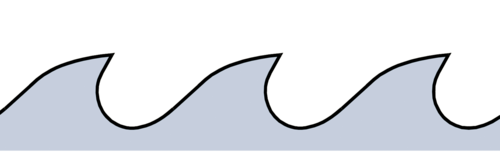
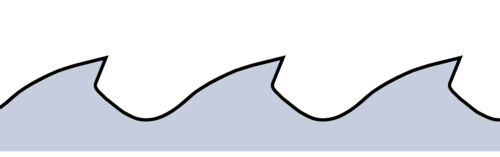
Saw tooth shapes for band saws